DIY Floral Silhouette Art
A sweet and simple DIY - silhouette art featuring floral stencils. It’s the perfect heartfelt keepsake to give to someone special or keep as decor in your home!
Looking for a sentimental, stylish, and easy DIY gift idea? This floral silhouette art is the perfect way to turn a favorite photo into a beautiful keepsake. Whether it’s for Mother’s Day, grandma’s birthday, or just because, this project adds a personal touch with a dash of floral charm.
Watch the tutorial video here.
What You’ll Need:
A side profile photo of your child or loved one
White or black cardstock or heavy paper Color depends on which silhouette method you chose
Access to Scissors or craft knife
Glue stick or craft adhesive I love Mod Podge for this!
Canvas, cardstock, or wood board as your background (this one is from the Martha Stewart line too)
Martha Stewart Vintage Florals Stencil Kit
Acrylic paint + stencil brush or sponge
Painter’s tape
Get everything you need to make this craft here (affiliate link)!
How to Make Floral Silhouette Art:
Step 1: Create Your Silhouette using Canva
Choose a clear side-profile photo.
Use Canva to turn it into a silhouette. Watch the tutorial here.
Print it out on white paper or cardstock and cut it out carefully to create your silhouette.
Alternative: Create Your Silhouette using Black Cardstock
Choose a crisp side profile photo and print it.
Cut out the silhouette and trace it onto black paper or cardstock.
Cut again carefully to create your final silhouette.
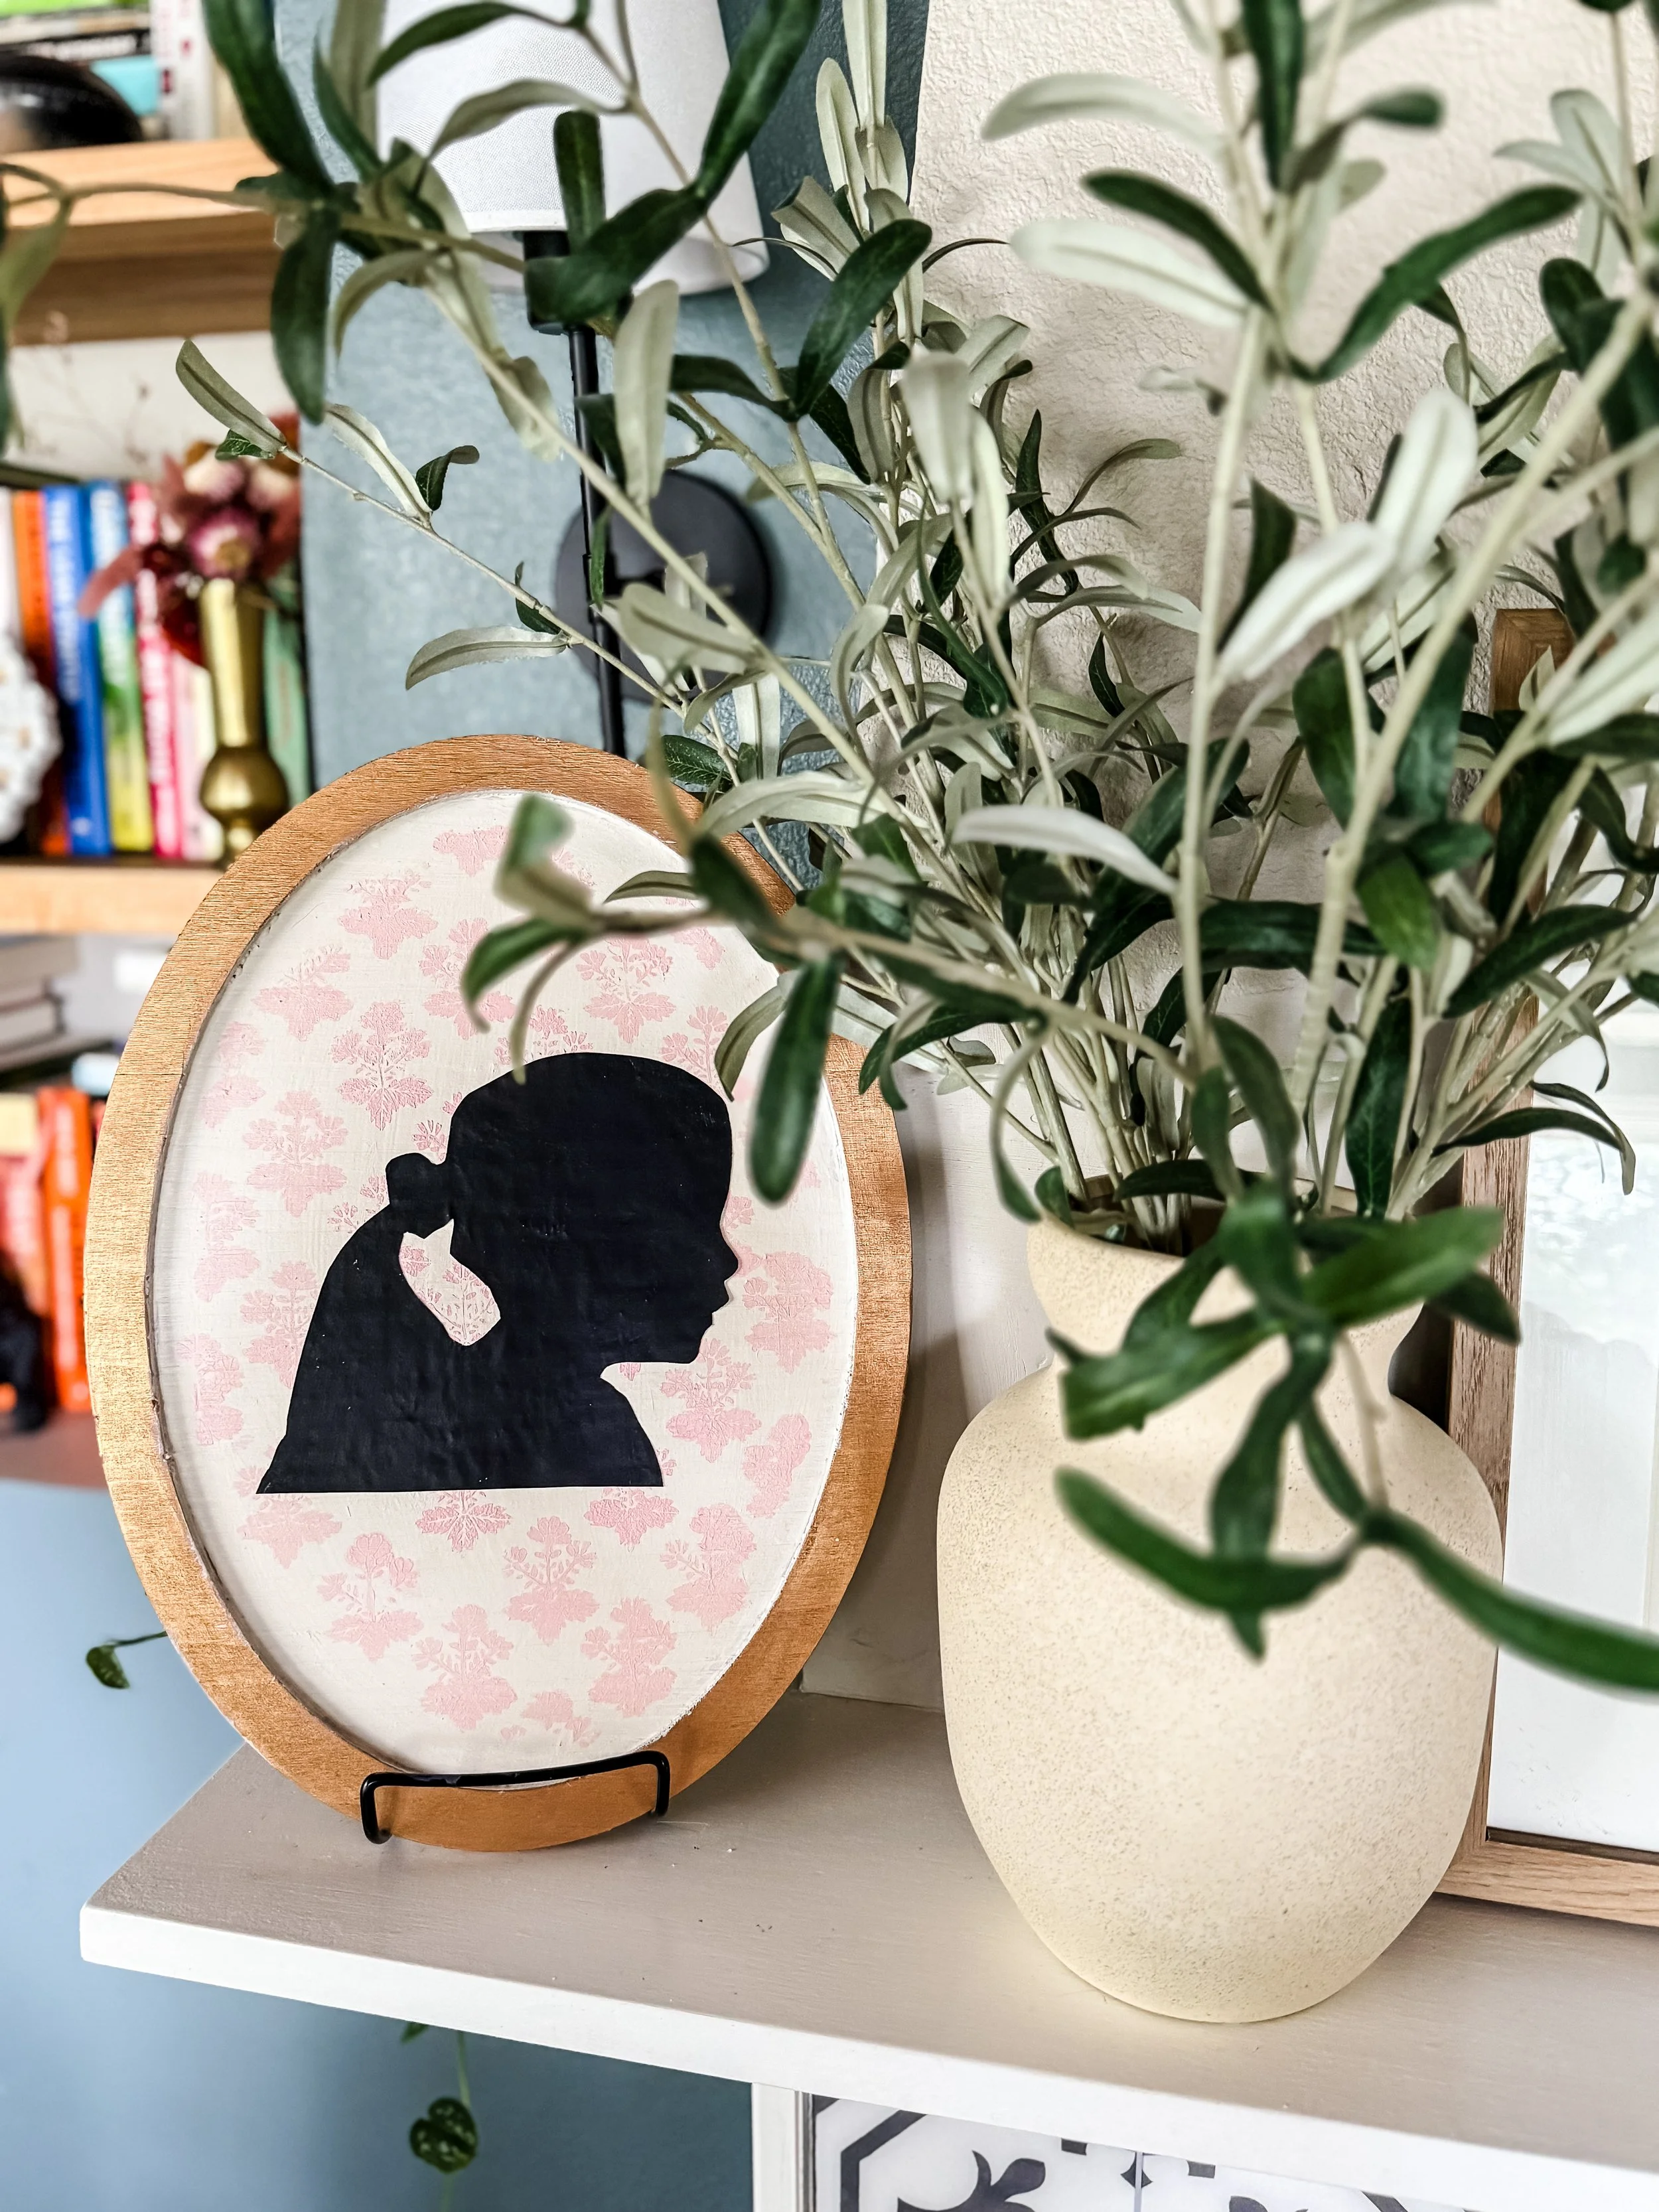
Step 2: Paint the Background
Choose a background (I used a neutral-toned canvas, but cardstock or even wood works beautifully).
Tape the floral stencil onto your surface using painter’s tape.
Lightly dab your paint over the stencil using a sponge or stencil brush. I used a blockprint style stencil.
Tip: Apply paint in light layers with a stencil brush or sponge, dabbing gently to avoid bleeding under the edges.
Step 3: Add Your Silhouette
Once the background is dry, center your silhouette and glue it on top.
Press gently to smooth out any air bubbles.
Ideas & Variations:
Add their name, date, or short quote with a paint pen for an extra-special touch.
Frame the finished art for a polished look or attach a ribbon to hang it.
This silhouette art project is one of my favorite ways to turn a meaningful moment into a keepsake—and it’s honestly easier than it looks. Whether you’re crafting with your little ones or putting together a thoughtful gift, this DIY checks all the boxes: heartfelt, beautiful, and fun.
Happy crafting!
P.S. Some of the supplies I used have been linked- these are affiliate links, which means I may earn a small commission at no extra cost to you.