DIY Air Dry Clay Place Card Holder
A soothing and simple DIY air dry clay craft using floral stencils—perfect for your next dinner party.
Crafting is one of my favorite ways to practice self-care. There’s just something incredibly calming about working with your hands—whether it’s painting, sculpting, or piecing together a DIY project. It helps quiet the mind, melt away stress, and spark joy.
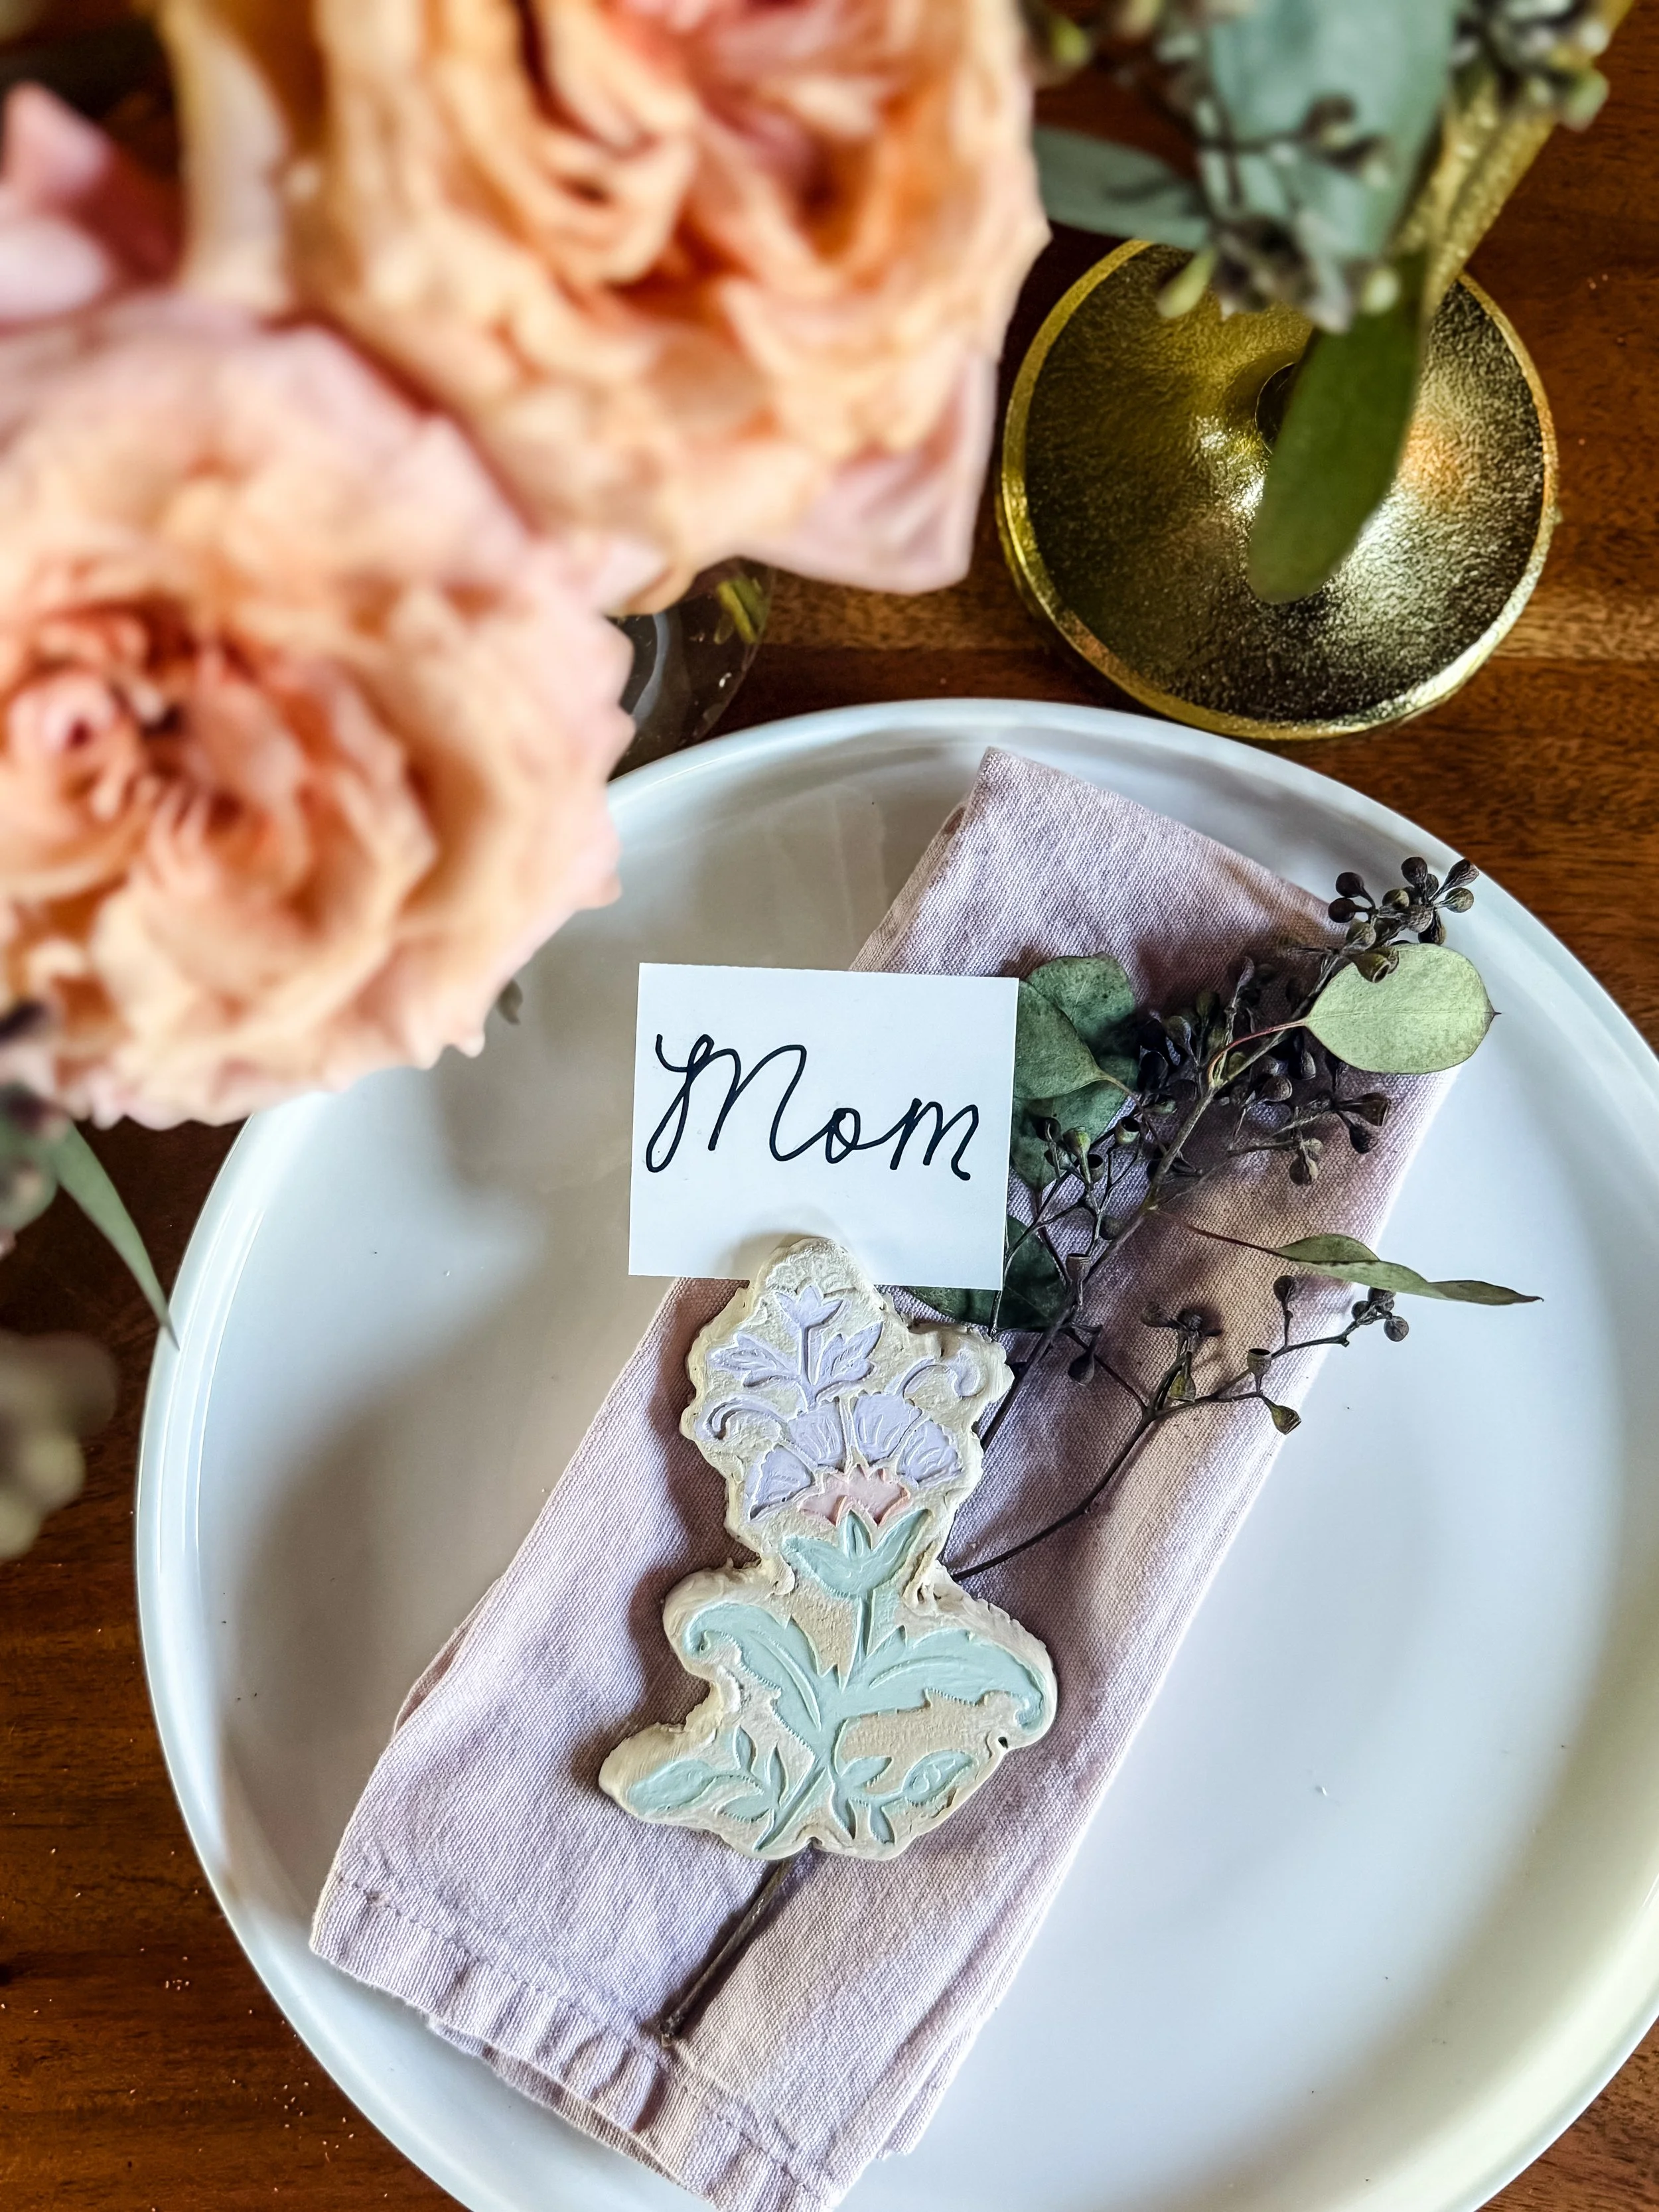
If crafting is on your self-care list too, I’ve got a sweet and simple project for you: a DIY air dry clay place card holder using stencils and paints from Martha Stewart’s new craft line with Plaid Crafts. It’s easy, beautiful, and can double as an ornament, gift tag, or paperweight.
Watch the quick tutorial video here!
Supplies You'll Need:
Air dry clay
Rolling pin or glass bottle
Craft knife or clay cutter
Martha Stewart Vintage Florals stencil kit
Acrylic paints
Paintbrushes or stencil sponge
Toothpick or straw (if you want to make it hangable)
Optional: Metallic paint pens, twine, or ribbon
Shop the supplies here (affliate).
How to Make a Clay Place Card Holder:
Step 1: Roll Out the Clay
Start by kneading your air dry clay for a minute until it’s soft and pliable. Then roll it out to about ¼" thick on a smooth surface.
Tip: Place parchment paper underneath for easy cleanup and clean edges.
Step 2: Cut Your Shape
Use a clay cutter, knife, or even a cookie cutter to cut out your desired shape—circle, oval, floral, or something seasonal. I cut out the shape of the stencil.
Optional: Use a toothpick or straw to poke a small hole if you want to use it as an ornament or gift tag.
Step 3: Add Floral Details
Gently press the floral stencil onto the clay. Carefully lift the stencil to reveal the pattern.
Trick: Use painter’s tape to keep the stencil from shifting for crisper lines.
Step 4: Let It Dry
Set your clay piece aside and let it air dry for 24–48 hours, depending on the thickness.
Step 5: Paint and Personalize
Once dry, you can paint and personalize it however you like! You can also add gold edges or extra painted details for a fancy touch.
Ideas & Variations:
Tie one onto a wrapped gift as a personalized gift tag.
Use it as an ornament by threading ribbon through the hole.
Add essential oils on the back for a scented paperweight or diffuser stone.
Whether you’re making one for yourself or someone else, this air dry clay craft is a small, meaningful way to bring beauty and calm into your day.
P.S. Some links may be affiliate links, which means I may earn a small commission if you make a purchase—at no extra cost to you!